Quickstart Guide - Sorting Out Open Source
Well… March came and went and I missed it completely. I was really busy this month with traveling and some other disruptions to my normal routine, so I didn’t have time to tackle documenting one of my more “fleshed out” projects for the blog. As a result, this post is going to be a short tutorial that’ll be on the lighter side content-wise.
For this tutorial, we will assume that the reader is familiar the idea of git and maybe a handful of basic commands, but has not contributed much to other people’s projects. The target reader is someone who is using version control for tracking changes to their own code, but does not have an understanding of some “best practices” for programming with others.
I’ll be using the OWASP Mobile Security Testing Guide as the example open source project for this tutorial.
Starting the Process
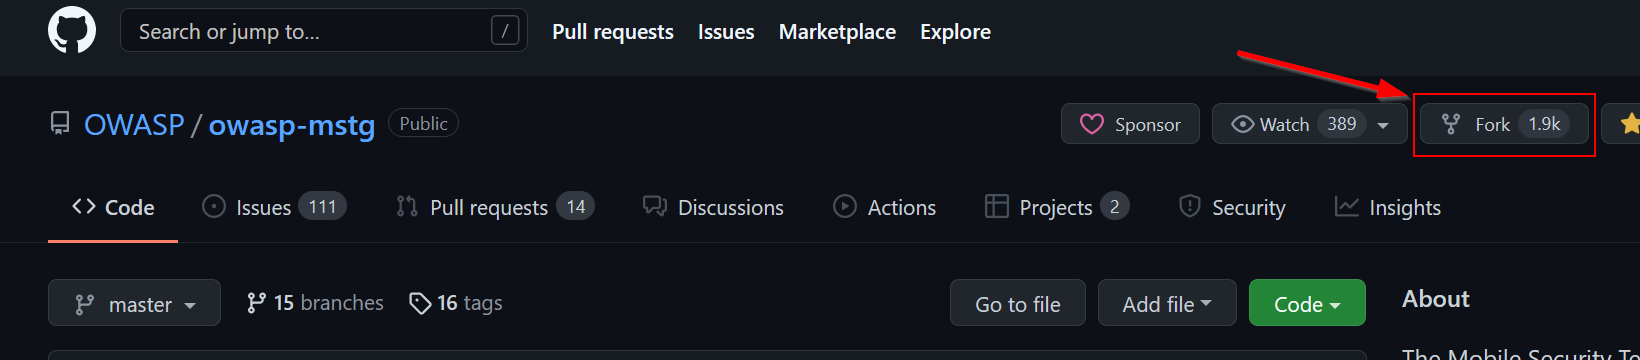
Fork Target Repository
Begin by locating the repository you’d like to make a contribution to and press the “Fork” button in the upper right-hand corner of the GitHub UI. Forking will create a copy of the repository under your user’s profile, including all its existing branches.
Clone Fork Locally
Next, we need to clone our remote fork locally (not the original) to make our changes. This part is easy, simply clone to your local machine like normal.
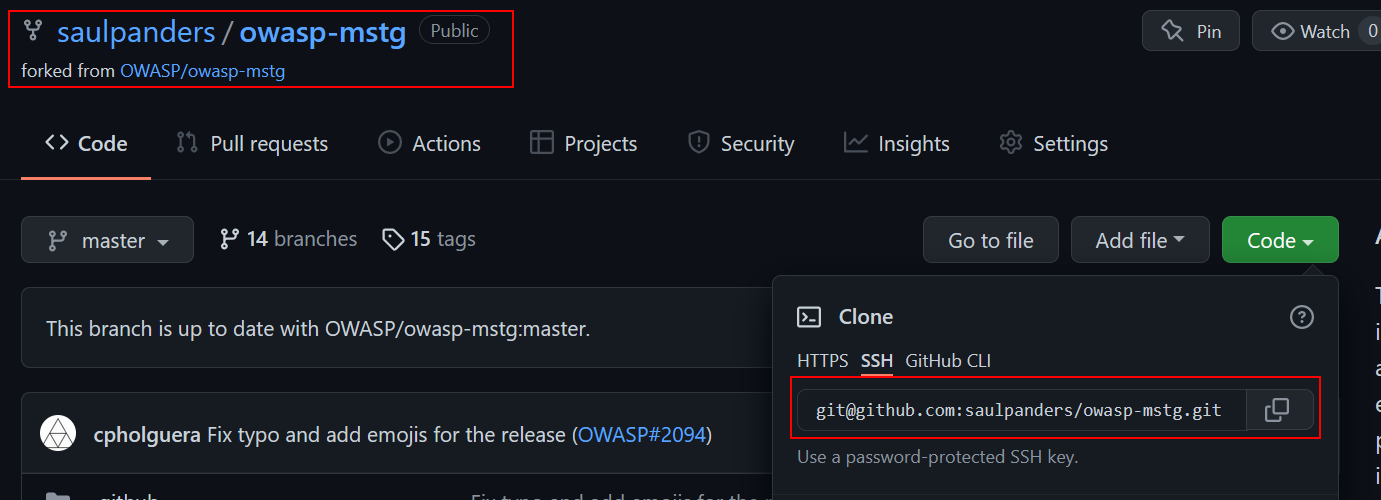
git clone git@github.com:saulpanders/owasp-mstg.git
Track Remote Upstream (Optional)
Although this section is not strictly necessary, it’s important to track upstream changes if you’re planning to contribute to the project in the future.
If you fork a repository, changes to the original (“upstream”) repository are not automatically pushed to your copy. We have to explicitly inform the new repo to follow changes made upstream. We may then refresh the new repo with changes made to the original through “remotes”.
Hop into the directory of the forked repository you just cloned and run the following commands. Make sure to replace the last part of the first line with the original repository’s clone URL (i.e. not the one with your username).
This will link the fork back to the original repository as a “remote”. For our purposes, we will name this link “upstream”, and then fetch it.

git remote add --track main upstream <original repo>
git fetch upstream
Create Your Branch
While you can make all your changes directly to the main branch, this is generally poor form and may complicate workflows down the road for a highly collaborative project. Instead, best practice is to checkout a new branch for each major change you’d like to make. When performing this step for real, replace new-feature-branch with a more descriptive name.

git checkout -b new-feature-branch upstream/main
Commit & Push Changes
First, verify you switched to the correct branch with a quick status check.
git status
Next, make your desired changes to the repo. You can commit as many times as you want, but be aware that other contributors may see your commit history if you chose to submit a pull request to a public project. Make sure to avoid committing any hard-coded credentials or API keys you may use for local testing.
When ready, just register the additions and commit like usual.
git add .
git commit -m "message describing new commit(s)"
Then push to your forked remote copy.

git push -u origin new-feature-branch
Now we should be all set to try and have our changes merged into the official project.
Updating the Source
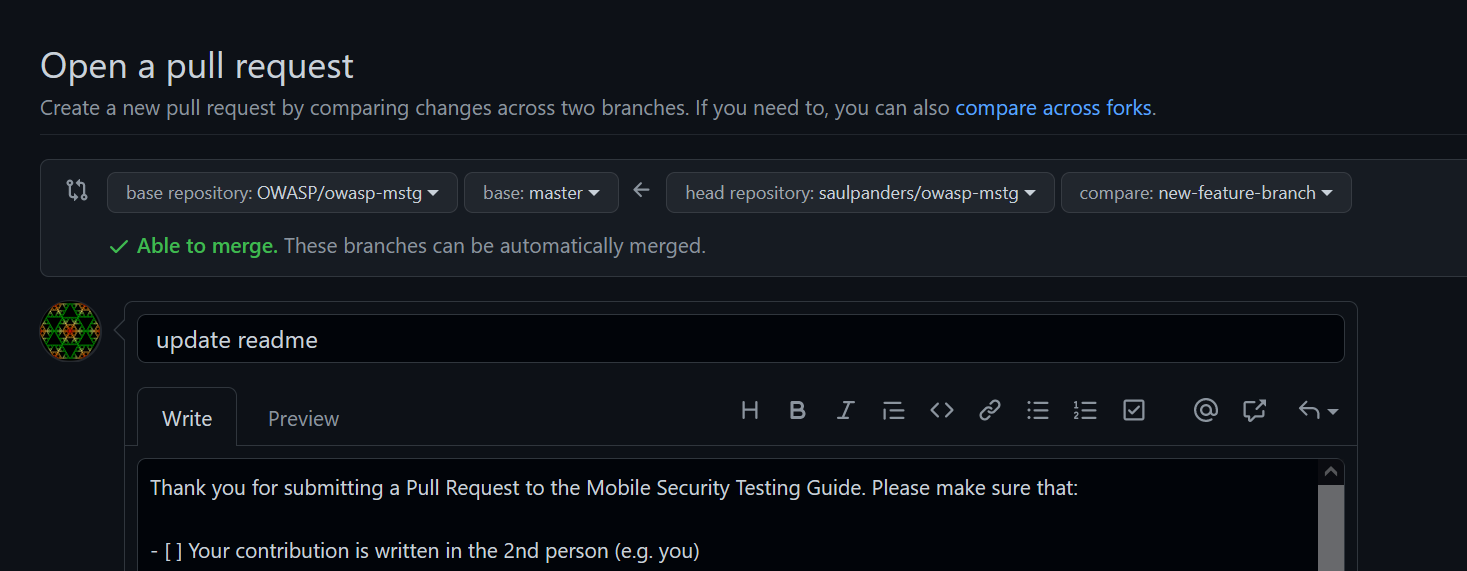
Making a Pull Request (fix)
Jump back to the original repositories “Pull Requests” tab, and you should see suggestion from GitHub to create a pull request from your newly pushed branch.

You’ll have the opportunity to write a message to the project’s maintainers about your pull request. Make sure to explain what modifications you’ve made to the original, including justifications for any decisions you made. Now is a good time to check and see if the project has a “Contributor’s Guide” to verify there are no issues with your request and the project’s existing standards.
Congratulations, you now have the knowledge to easily engage with new and exciting open source projects. Go forth and prosper!
Source(s):
- https://git-scm.com/doc
- https://docs.github.com/en
- https://www.w3schools.com/git/default.asp
- https://jarv.is/notes/how-to-pull-request-fork-github/